Views: 1 Author: Site Editor Publish Time: 2024-11-07 Origin: Site


Control arm bushings are a critical component of your vehicle's suspension system. Over time, they can wear out due to age, road conditions, or driving habits, leading to issues such as poor handling, abnormal tire wear, and even compromised vehicle stability. Replacing or changing control arm bushings is essential for maintaining optimal performance and ensuring a smooth driving experience. In this article, we’ll walk you through how to replace, change, and install bushings in control arms.
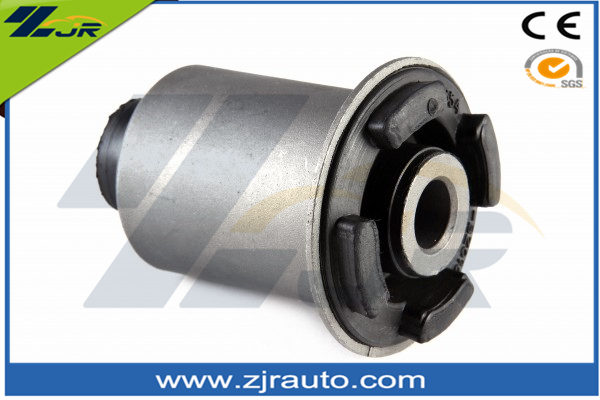
Before diving into the replacement process, let's take a closer look at what control arm bushings are and their role in your vehicle. A control arm bushing is a small but crucial part of the suspension system that connects the control arm to the vehicle’s frame. These bushings help absorb shocks and vibrations, allowing for smooth handling by ensuring that the control arm moves properly within its designated range.
Most vehicles use two types of control arm bushings: upper and lower. Bushings for lower control arm are particularly vital as they support the weight of the vehicle and absorb impacts from rough roads. When these bushings wear out, the control arm can become loose, affecting your vehicle’s alignment and causing uneven tire wear or steering issues.

The bushings in your vehicle’s control arms tend to wear out over time because they are exposed to constant stress, friction, and the elements. When they degrade, you may experience several symptoms, including:
Clunking noises when driving over bumps or turning.
Poor handling or responsiveness, especially when steering or cornering.
Uneven tire wear caused by improper alignment.
Vibrations or a rough ride.
If you notice any of these issues, it’s likely time to replace the bushing control arm. Luckily, this task is doable for most DIY enthusiasts, provided you have the right tools and follow the correct steps.

Replacing control arm bushings involves removing the old, worn bushings and installing new ones. Below is a step-by-step guide to help you through the process:
Jack and jack stands
Wrenches and sockets
Control arm bushing press (or hammer and punch)
Torque wrench
Grease (optional but recommended for lubrication)
First, secure your vehicle using a jack and raise it high enough to work underneath. Use jack stands for added safety, and remove the wheel on the side where you plan to replace the bushings.
Once the vehicle is securely lifted, locate the control arm that holds the bushings. The lower control arm is often the most problematic due to its constant exposure to stress. Identify the bushing control arm components by looking for the rubber bushings that connect the control arm to the vehicle frame.
To remove the control arm, you’ll need to unbolt it from both the chassis and the steering knuckle. Use your wrenches to loosen and remove the bolts that attach the control arm to the frame and suspension components.
Once the control arm is free, you can begin removing the old bushings. If your vehicle uses press-fit bushings, a bushing press will be necessary to push the bushings out of the control arm. If you don’t have a press, a hammer and punch tool may also do the trick. Be sure to remove all debris or remnants of the old bushing to make room for the new one.
Installing new bushings for lower control arm is the next step. Before inserting the new bushings, apply a small amount of grease or lubrication to help with installation and to extend the life of the new bushings. Align the new bushing with the control arm and use a bushing press to push it into place. Be careful not to damage the control arm while pressing in the new bushings.
With the new bushings in place, you can now reinstall the control arm. First, position the control arm back into its proper location and secure it with the bolts you previously removed. Use a torque wrench to ensure all bolts are tightened to the manufacturer’s specified torque values. This is critical to ensure safety and proper suspension function.
Once the control arm is secured and all bolts are tightened, you can reattach the wheel and lower the vehicle back to the ground. Make sure to check the alignment of your vehicle to ensure the suspension system is functioning correctly.
Finally, after everything is reassembled, take your vehicle for a short test drive to ensure the handling feels smooth and there are no unusual noises. Inspect the control arm and suspension components once more to verify that everything is in place.
If you need to change control arm bushings, the process is almost identical to the steps outlined above. The term "change" simply refers to replacing the old bushings with new ones, so follow the steps accordingly. If you're unsure about performing this repair yourself, it’s always a good idea to consult a professional mechanic or take your vehicle to a service shop.

To install bushings in control arm, follow the same process as replacing them. The key difference is that installing bushings typically refers to the precise insertion of new bushings into a control arm assembly, which is a crucial step for ensuring proper suspension function. Whether you are replacing bushings for lower control arm or upper control arm bushings, the installation process will be similar.
Replacing control arm bushings is a critical maintenance task that ensures your vehicle’s suspension system functions properly. By following the right steps, you can effectively replace or change bushing control arm components, restoring the comfort and handling of your vehicle. Always use quality parts to avoid further issues down the road.
For premium-quality control arm bushings and other automotive parts, consider checking out ZJR Auto. With a reputation for high-quality products, ZJR Auto ensures your vehicle’s suspension system operates at its best.
For more information, visit their website or contact them directly:
Email: info@zjrauto.com
Phone: +86 13702583315